How to Work Simultaneously in Multiple Parts of the Same Excel Workbook
“Mirror, mirror on the wall….” Many of us struggle to work with Excel files because you can only see one part of a file at a time…when you want to make a change to one part of a model and see the impact it has elsewhere, you have to flip over to the other section, right? Similarly, if you want to link a sheet to another sheet in the same file, you have to keep moving from sheet to sheet, right? Wouldn’t it be nice if you could work with two or more parts of a workbook, including different sheets, as “mirrors” or live separate windows so that if you need to view them at the same time and easily switch between them, you can? Yes, it would….and you can do it quite easily using some of the tools in the “Windows” section of the “View” menu tab of Excel.
Let’s suppose you’re working on a model like the one pictured below. Note that as seen in the Switch Windows area of the View tab, there is only one file open called “Medallion Model”:
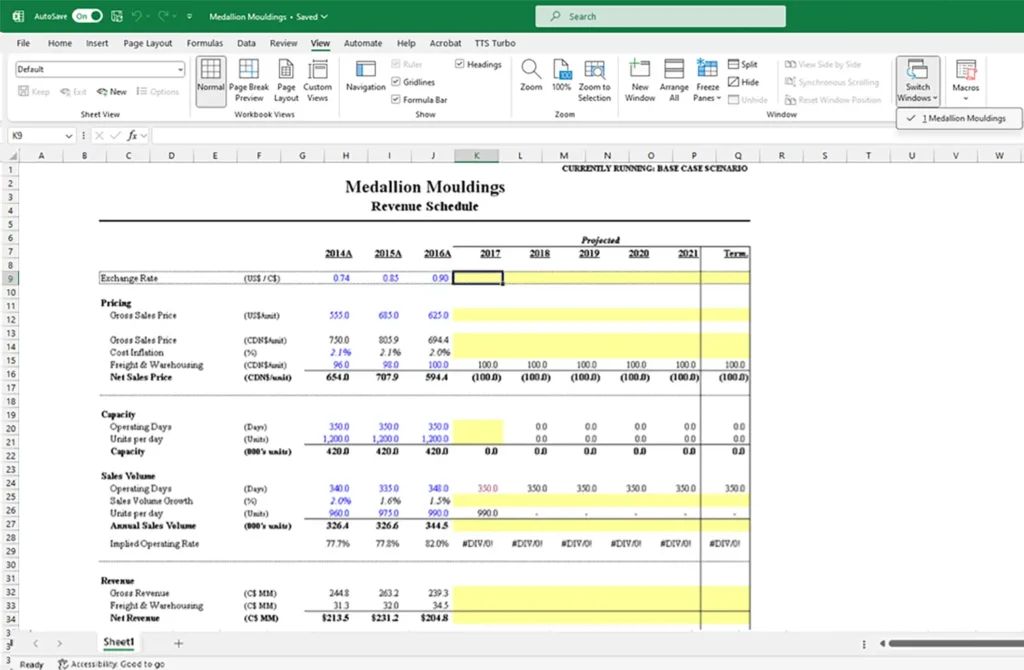
Let’s suppose you’re working on a model like the one pictured below. Note that as seen in the Switch Windows area of the View tab, there is only one file open called “Medallion Model”:
Step 1 – Create a Mirror Window of the File:
Go to the View tab and select New Window (Alt W, N). This will automatically create a duplicate version of the file, as shown below. Notice that now in the Switch Windows area, there are two “files”, Medallion Model:1 and Medallion Model:2.
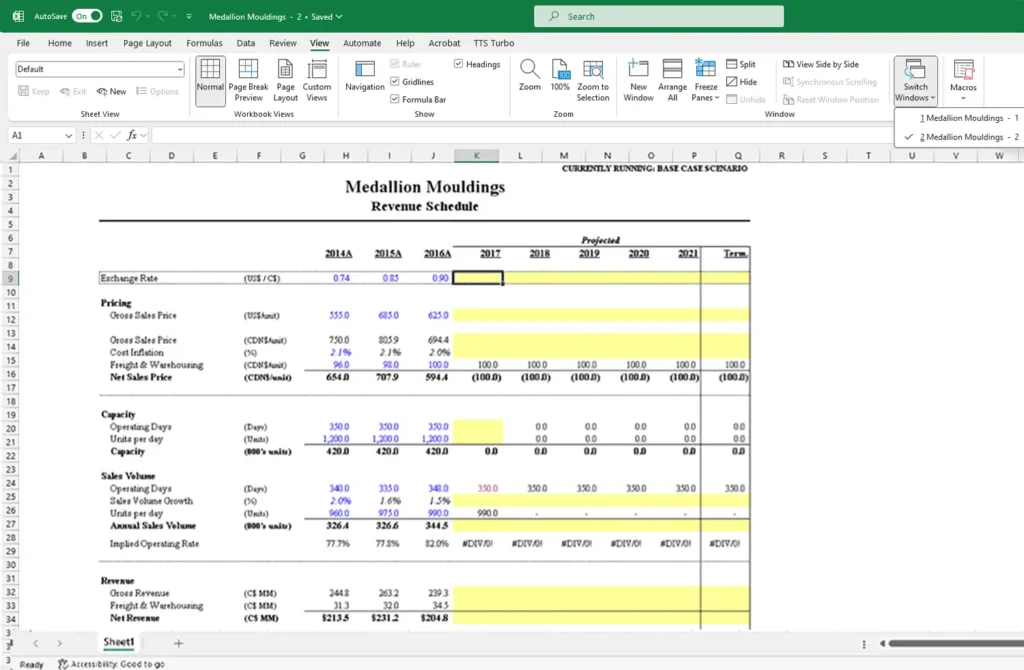
However, these two “files” are not actually different files. Rather, the New Window option creates a duplicative “mirror” of the file in a separate window. Any changes made in “:1” will simultaneously appear automatically in “:2”. For some reason, the newly created window does not adopt the same zoom size or gridline settings as the original one, but this can be changed manually.
Step 2 – View Both Mirrors at the Same Time:
To see both mirror windows at the same time, go to the View tab and then select Arrange All: (Alt + W + A).
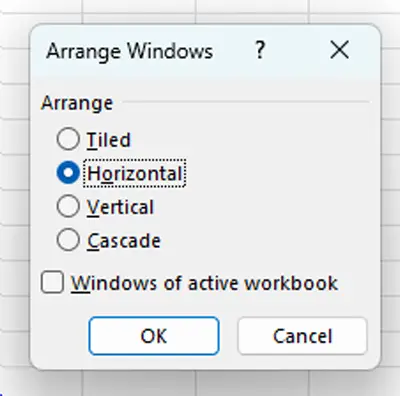
You can choose the view style you prefer. If you choose Horizontal, it will look like this:
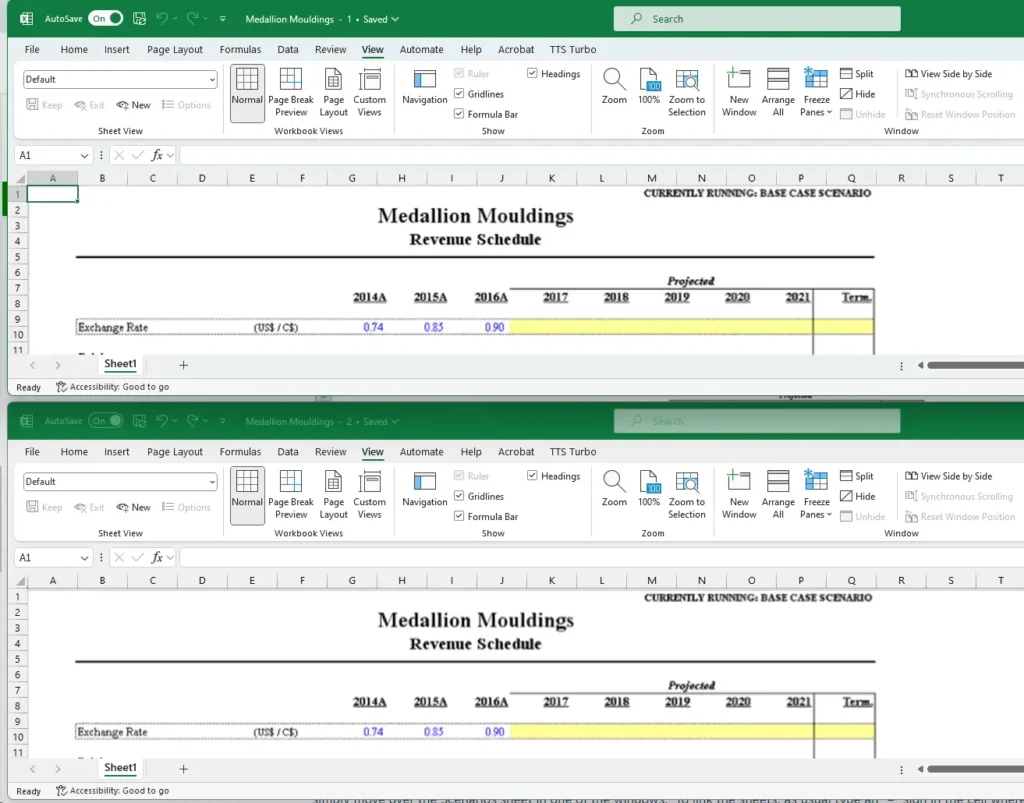
As mentioned, anything you do in either window will be duplicated in the other.
Step 3 – Start Working with Both Windows:
To create an easy interface to link the Model sheet to the Scenarios sheet, simply move over the Scenarios sheet in one of the windows. To link the sheets, as usual type an “=” sign in the cell where you want to build a formula on the Model sheet. To flip to the other window, use the CTRL + Tab shortcut and then use the arrow keys to move to the link destination cell then hit Enter:
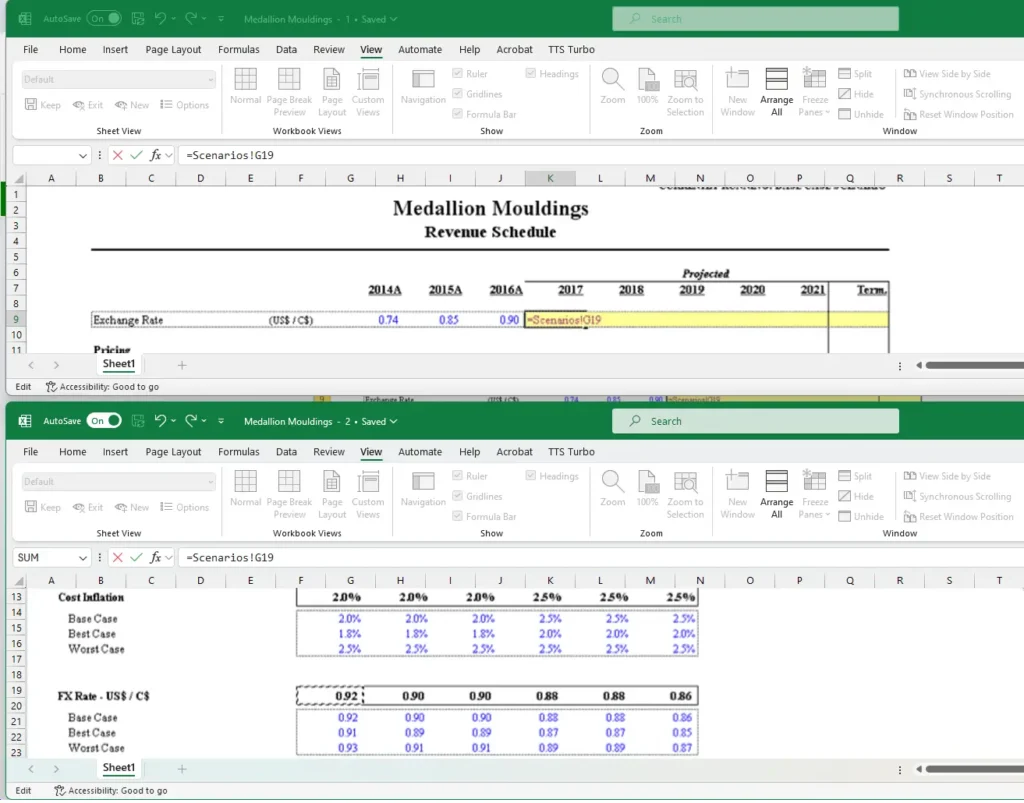
With the CTRL + Tab shortcut, it’s very easy to navigate between the windows.
A few additional notes about this technique:
- To close one of the window mirrors, simply click the X in the top right corner of the one of the windows and then maximize the other.
- You can of course create more than one duplicate and keep repeating the steps above to view 3 or more mirror windows at the same time.
- When you activate Arrange All, any open windows or files will be displayed. So it’s helpful to only have the windows you want to arrange open when you use Arrange All. To hide a file or window without closing it, go to the View menu and choose Hide.
- People who learn this trick often ask if it can be used on multiple monitors. The quick answer is “No”, because the operating system won’t let you drag a window of an application to another monitor. But you can tile the windows vertically, and then carefully “stretch” Excel over the two monitors.
Learn more with Training The Street
If you enjoyed reading this article and want to improve your Excel Skills further, then why not try our Excel Best Practices for PC Self-Study Course. You can also browse our other range of Self-Study Courses here.
Training The Street also offers a more advanced In-Person/Virtual Public Course called, Applied Excel where you can gain the skills needed for parsing, analyzing, and presenting information from large data sets.


